Ceramic tiles are popular for their durability and beauty. They are often used in kitchens, bathrooms, and floors because they are both strong and visually appealing. However, when it comes to drilling through ceramic tile, many people worry about damaging the tile or cracking it.
Fortunately, with the right tools and techniques, you can drill through ceramic tiles without any problems. This guide will show you how to do it safely and efficiently.
Tools You’ll Need for Drilling Through Ceramic Tile
To drill through ceramic tile, you’ll need a few essential tools. These tools will help you make a clean, precise hole without damaging the tile.
Drill: A regular power drill works fine, but a variable-speed drill is best for controlling the speed.
Drill Bit for Ceramic Tile: You need a special drill bit designed for hard surfaces like ceramic. A carbide-tipped or diamond-tipped drill bit is ideal.
Masking Tape: Use this to mark the spot where you’ll drill. It helps prevent the drill bit from slipping.
Water or Lubricant: This keeps the drill bit cool and reduces friction, which helps prevent cracks.
Pencil or Marker: To mark the exact spot on the tile where you want to drill.
These tools are easy to find and essential for ensuring you can drill through ceramic tile without issues.
Read more: Top 12 Best Ceramic Tiles Exhibitions Globally in 2024
Preparing Your Ceramic Tile for Drilling
Marking the Spot
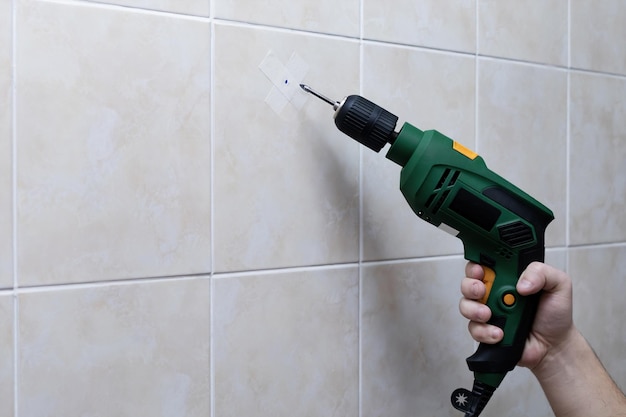
Before you start drilling, it’s important to mark the spot where you need the hole. Use a pencil or marker to draw a small dot on the tile. Once you’ve marked the spot, place a piece of masking tape over it. The tape will help keep the drill bit in place and prevent it from slipping on the smooth surface of the ceramic tile.
Choosing the Right Drill Bit
The drill bit is the most important tool in this process. Regular drill bits won’t work well on ceramic tile because they aren’t strong enough. Instead, you’ll need a carbide-tipped or diamond-tipped drill bit, which is designed to cut through hard materials like ceramic tiles. Make sure to choose the right size for the hole you need.
Before you start drilling, attach the appropriate drill bit to your drill. Set the drill to a low speed. This helps you control the drilling process and prevents the ceramic tile from cracking.
Step-by-Step Guide to Drilling Through Ceramic Tile
Starting the Drilling Process
Position the Drill Bit: Place the drill bit on the marked spot. Hold the drill steady and make sure it’s perpendicular to the tile.
Apply Gentle Pressure: Begin drilling at a slow speed, applying gentle pressure. Let the drill do the work. Don’t push too hard, as this can crack the ceramic tile. As you start drilling, the masking tape will help keep the drill bit in place.
Drilling Through the Tile
Increase Pressure Gradually: As the drill bit starts to cut into the tile, you can gradually increase the pressure. Continue to drill at a steady speed. If the drill bit heats up, pause and let it cool down or apply water to keep it cool. This reduces friction and helps prevent the tile from cracking.
Finish Drilling: Once you’ve drilled through the ceramic tile, reduce the pressure and slowly remove the drill bit from the hole. This prevents chipping around the edges of the hole.
Common Mistakes to Avoid When Drilling Ceramic Tile
Using the Wrong Drill Bit
One of the most common mistakes is using the wrong drill bit. Standard drill bits aren’t strong enough to cut through ceramic tile and can easily break or cause the tile to crack. Always use a carbide-tipped or diamond-tipped drill bit designed for hard materials like ceramic tile.
Applying Too Much Pressure
Another common mistake is applying too much pressure when drilling. Ceramic tiles are strong, but they can crack if too much force is applied. Always start with gentle pressure and increase it gradually as the drill bit begins to cut into the tile.
Drilling at the Wrong Speed
Drilling too fast can also cause the tile to crack. It’s important to drill at a slow and steady speed, especially at the beginning. A variable-speed drill is ideal because it allows you to control the speed as you drill.
Finishing Touches After Drilling
Cleaning Up the Area
Once you’ve drilled through the ceramic tile, it’s time to clean up. Carefully remove the masking tape from the tile. Use a damp cloth to wipe away any dust or debris from the hole and the surrounding area. This ensures that the surface is clean and ready for any additional work, such as installing a fixture or hanging a picture.
Inspecting the Drilled Hole
After cleaning up, inspect the hole you’ve drilled. Make sure the edges are smooth and there are no cracks around the hole. If the hole is a little rough, you can use a small file to smooth out the edges.
Why Choose Quality Ceramic Tile?
Ceramic tiles are a great choice for many home and commercial projects because they are durable, water-resistant, and come in a variety of styles and colors. When you choose quality ceramic tiles, you’re investing in a product that will last for years and look great in any space.
For those interested in sourcing the best tiles, exploring options for ceramic export from India can provide access to high-quality, affordable tiles. Indian ceramic tiles are known for their craftsmanship and variety, making them a popular choice for projects worldwide.
Conclusion
Drilling through ceramic tile might seem challenging, but with the right tools and techniques, it’s a task you can handle with ease. Remember to use the correct drill bit, apply gentle pressure, and drill at a slow speed to prevent cracking.
By following these steps, you can safely and effectively drill through ceramic tile for your next DIY or professional project. With practice and patience, you’ll be able to make clean, precise holes in ceramic tile every time.